Showing posts with label before and after. Show all posts

Friday, June 11, 2010

before & after :: planner

13_tutorial

i hear the question "how did you think of that?" a lot. or, "if i only had your eye for things."

i think sometimes people get too caught up in what something looks like now instead of looking at things for what they can be. so many times, the things i get the most compliments on, are the things i pick up at a garage sale for next to nothing and transform. i think it's mostly because i'm someone who's good at seeing the potential in something. i'm good at ignoring the horrible paint job or the tiny hole that could be repaired and instead look at the "bones" of the item. does it have good form? is it well made? would it look better just by changing the color? these things are so easy to change and can make such a huge difference.

i've shown you a few of my more involved transformations, but i thought i'd start to share with you some of the really quick and simple things you can do to everyday items to make them fit your needs. (without taking a lot of time or breaking the bank!)

for example, the other day i had to head to the office supply store to get a new small planner for my purse. as i looked through the stacks and stacks of horribly designed planners i started to get frustrated. it seemed that if the cover was nice, the inside was horrid. if the inside looked nice, the cover was awful. i settled for the one where i liked the inside the best since that's the part you can't really change. i decided i would alter the covers when i got home.

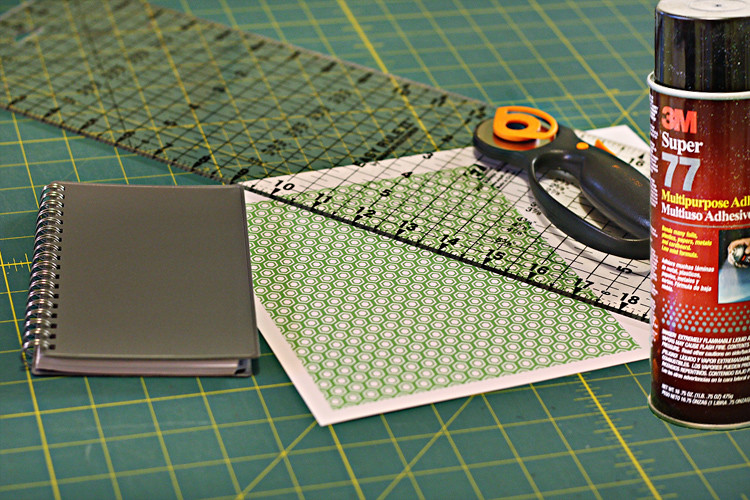
here are the supplies i used:
transforming a planner

  1. my simple planner on the left with the plain grey cover.
  2. a ruler
  3. a rotary cutter (or scissors, xacto knife)
  4. super 77 (i highly recommend this spray glue. other glue may work, but this glue is sure to hold!)
  5. whatever you want to cover your object with. don't get hung up on this part. i printed out a pattern i designed but if you don't have the ability to do that, think outside the box. use a page from a magazine, book, fabric, etc. there are a million places online to download other people's designs, often for free! (please make sure you have the right to download other's deigns. just because it's on the internet doesn't mean everyone has the rights to it!)
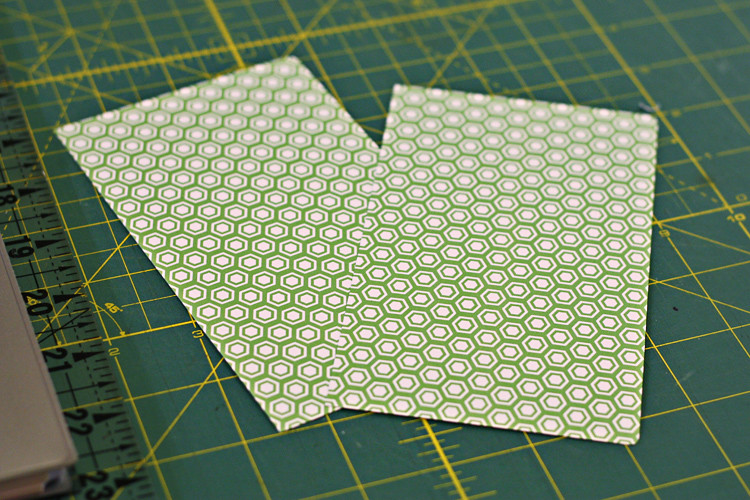
transforming a planner start by measuring the cover of your book and cut your paper to the size required. i made mine a little smaller than the cover itself transforming a planner i also quickly rounded the corners of my paper with a scissors to match the cover. transforming a planner once your covering is cut to size, simply spray with the spray glue and press to adhere. voila! you're done!
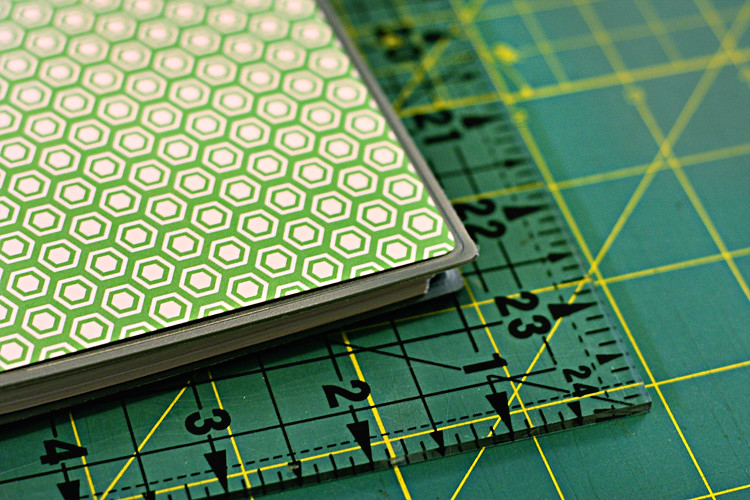
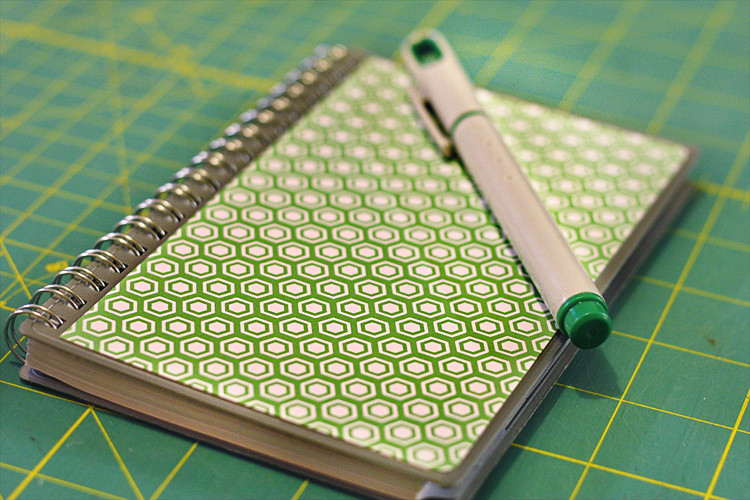
the whole project probably took 15 minute to complete and that includes taking photos along the way. super simple, quick, and easy! and now instead of a plain vinyl cover, i have a customized planner that's sure to get comments when i whip it out of my purse.

Saturday, April 10, 2010

design*sponge feature (again!!)

othernews

oh, and did i mention that my thrifty finds before & after shutter project was featured on design*sponge on thursday? well, it was! how exciting! you can check it out here.

d*s

Thursday, April 08, 2010

thrifted :: before & after :: shutters turned jewelry case

5_thursday

before

i've been very excited to share this project with you. it all started last summer with the above pair of small shutters i found at a garage sale. i knew exactly what i wanted to make with them but i wasn't sure what that "something" might hold. at first i thought i would use it in my office, but then i had the idea of creating a jewelry case to house all of my vintage jewelry finds.

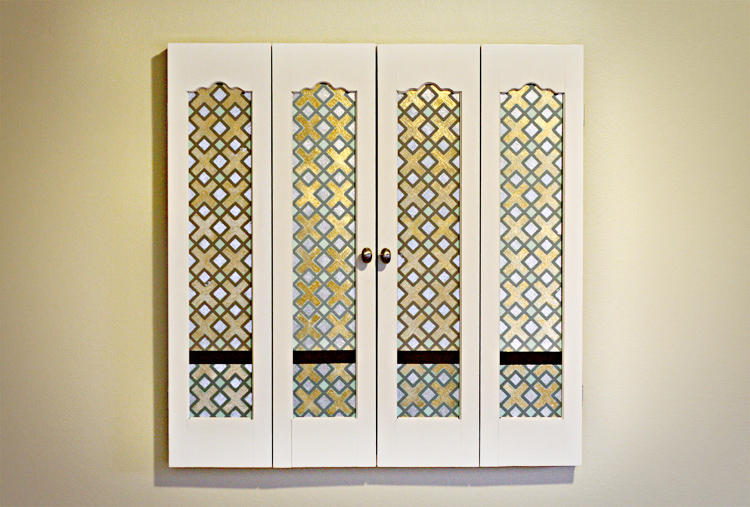
closed

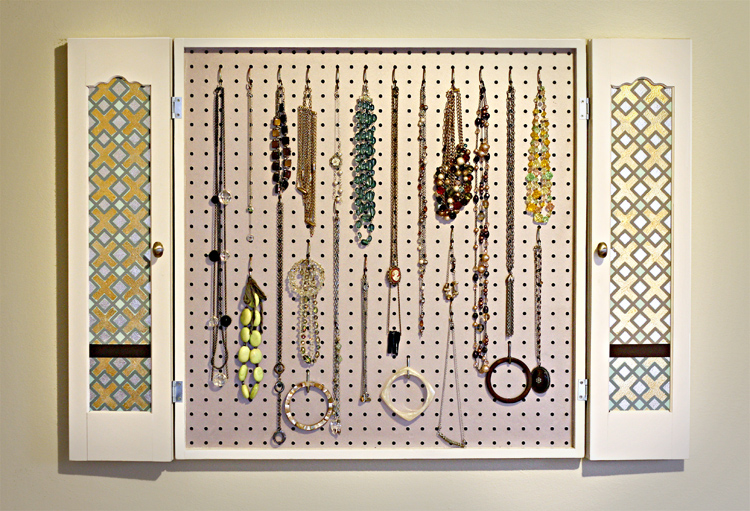
open

here's the finished product and a tutorial on how to make your own!

part of my challenge to myself with this project was to create it using materials that we already had. sort of a "green" thrifty project. i gathered some supplies and headed to my parent's house where my dad could help me with all the cutting. we don't have a ton of power tools here, so i needed to "borrow" some for the day.

cutting wood

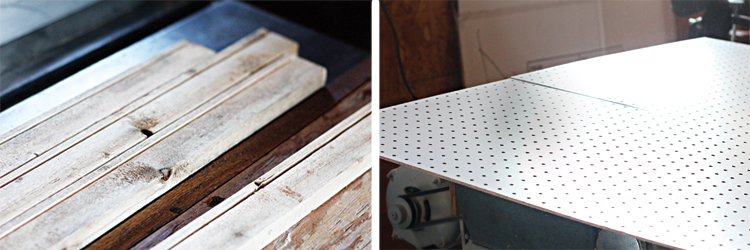
i brought over some left over trim from who-knows-what-project that was just sitting around in the garage. i also had some left over peg board from my office makeover. we used these two items to build the "frame" of the case. we started by cutting a channel into each of the side boards in which the peg board would sit. once it was all cut, we glued, screwed, and clamped it together to dry. this was the most tool-intensive part of the project. after this, it was smooth sailing and i headed home to finish the rest.

framing sanding

once i got home i patched up some spots in the wood that needed it and sanded it down.

taping priming

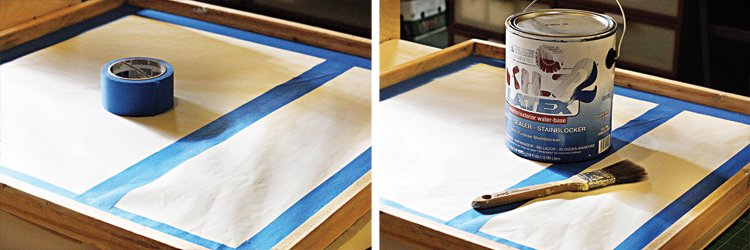
once nice and smooth, i applied a coat of primer and white paint. (all things that i had here) one step that i forgot to photograph along the way was applying a metallic spray paint to the inside/back of the case. this was also something i had in my craft closet!

once the frame was all painted and finished, i moved onto the shutter portion of the project.

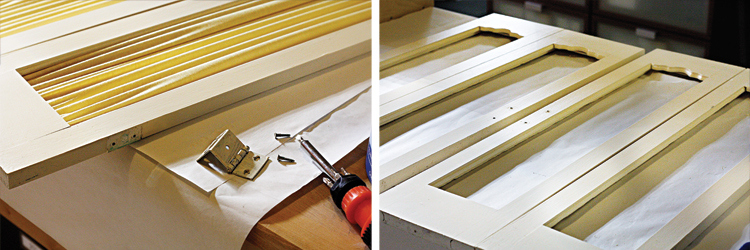
disassemble shutters

the first thing i did was remove all the hardware. most of it was painted over several times and/or in really rough shape. none of it was salvageable. i also did away with the fabric panels on the inside of the shutters as i wanted something a little more sleek. i lightly sanded and put a fresh coat of white paint on the shutters to match the case.

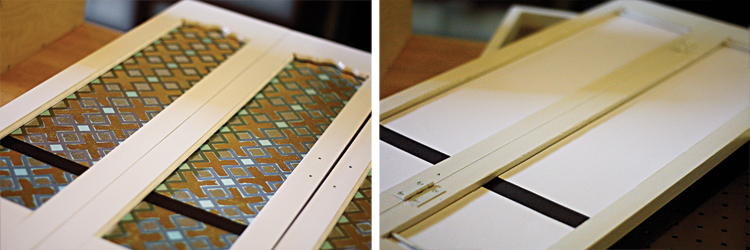
inserts

after the shutters were dry, i put in the inserts i made. this was sort of a painstaking process that most "normal" people probably wouldn't bother with, so i didn't photograph the steps, but i'll give you a quick rundown.

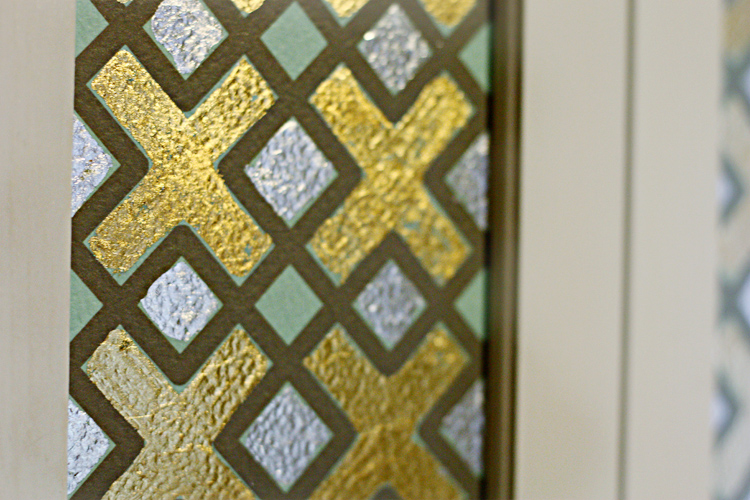
leafing

for the inserts: first i printed out some of my fin+roe patterns on my oversized printer to fit the panels. then i gold and silver leafed different areas of the pattern. i added a brown grosgrain ribbon accent near the bottom of the panel. because paper (even at 120#) is obviously a little floppy, i backed it with a chipboard then then a white paper on the back. i added the same grosgrain ribbon on the back of the panel as well so that when it's open it still looks finished. all of the supplies mentioned here were also things from the craft closet. nothing extra was purchased.

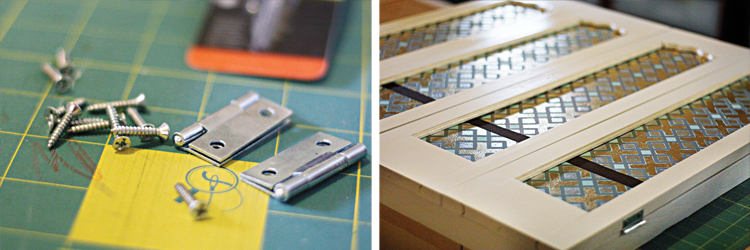
hinges

once the panels were all inserted, it was time to attach the shutters to the frame. unfortunately since the hinges were unsalvageable, i did have to buy a couple new sets. (plus the hinges that were attached were meant to hang directly on the wall so they wouldn't work for what i was doing) i simply pre-drilled some holes and screwed the hinges into both the shutters and the frame. the other thing i had to replace (and purchase) on this project was the knobs. the ones that were on when i bought them were crappy plastic pieces that were discolored. i picked up some inexpensive options at home depot and screwed them on. at this point i actually have a working case!

open side

jewels

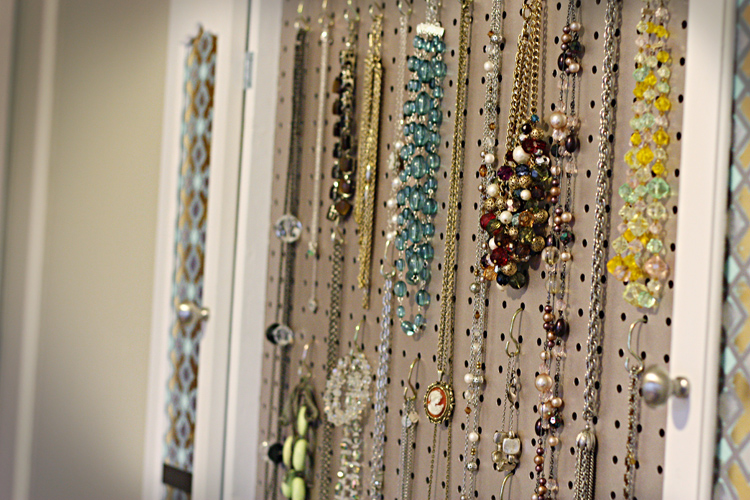
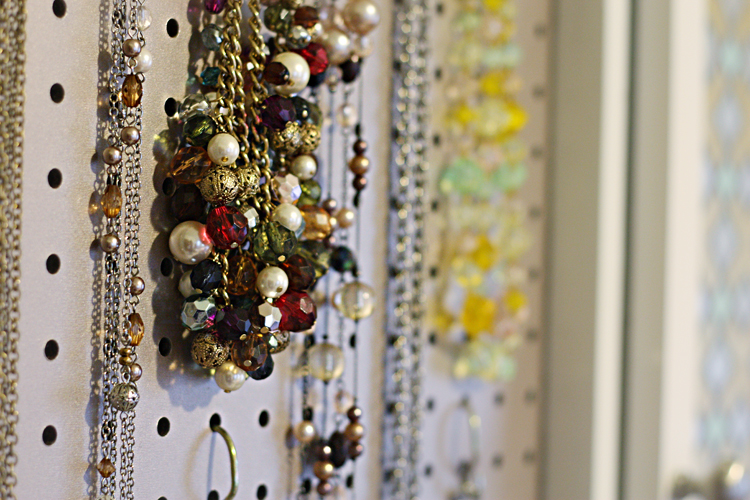
i attached a couple photo hangers to the back and hung it in our bedroom (part of a bedroom makeover i'm slowly working on). the most fun part was hanging all of my necklaces in it and seeing my vision come to life! you may remember me posting about my jewelry drawers in our bathroom a few months back. not to worry. those are still there and i'll now be able to spread things out a little more since the necklaces have a home of their own. no more doubling up on brooches!

Thursday, November 19, 2009

thrifted :: spool display :: before & after

5_thursday

hold on to your seat! i'm about to reveal my all time favorite thrifty finds before & after project! i'm hoping you're as thrilled about it as i am. this project has been in my head for the last year or so and i'm so excited that it's finally complete!

a little back-story. i started collecting spools about 8 years ago or so. i loved them for their vintage qualities as well as their vibrant colors. my collection has grown quite a bit over the years and the large apothecary type jars i was displaying them in were overflowing. i needed a new way to display them that would also allow for more growth. (because, well, you never know when you'll find another great spool!) the following idea was born....

thrifted :: before & after

i spent my summer thrifting wooden boxes and/or display pieces. all different shapes and sizes. i then took them all and coated them in nice bright white to match the trim in our house. this process took me more hours that i can count. all the little nooks and crannies in those boxes was enough to drive me mad! but, i did it. i laid them out on the floor to determine the layout for the wall.

thrifted :: before & after

after lots of measuring and leveling, this is what i had. (there is a shelf missing in the lower left corner that was still drying when i took this photo).

thrifted :: before & after

then came the fun part! laying out all my spools and arranging them by color.

thrifted :: before & after

these are just some of my spools. i still have more, but only used my most favorite in this project. i knew i wanted to arrange the spools by color but didn't want it to look too much like a rainbow so i started out with blue and worked from there.

thrifted :: before & after

after 8 years of collecting spools and a summer of collecting the right display pieces, here is the final result. it is so exciting to see my idea a reality. what's even better is that it looks like i envisioned it. sometimes i get ideas in my head but then when i finish it, it's nothing like i thought it would be. i think this might be even better than i imagined!

thrifted :: before & after

a close-up of the lower left shelf.

thrifted :: before & after

the bench in this photo is another thrifty find from this summer. i love how it's so old and obviously vintage, but has such clean and modern lines. the epitome of my style. modern vintage. the suitcase underneath is also a thrifty find. one of my favorite finds at only $2!

thrifted :: before & after

this project is in our front entry hall. it's the first thing people see when they come in the front door, and the first thing i see when i come down the stairs in the morning. i don't think i can look at it without smiling. those bright and cheery colors just put an instant perma-grin on my face.

i hope you enjoy my thrifty hallway!

Thursday, August 27, 2009

magazine rack

5_thursday

magazine rack

i wanted a magazine rack for our sunroom and was on the lookout for quite awhile every time we went thrifting. the problem was that all the ones i found were either brass or really ornate, curvy stuff. then, i came across this simple, clean-lined, beauty! i painted her up in a glossy white and then added the same pattern that's on our new floors to the inside of the rack.

Thursday, August 20, 2009

thrifted: print | clutch

5_thursday

print_mosaic

here are some before and after photos of a print i recently bought at a flea market. i know it's not for everyone. (one of them being my hubby.) i love the quirky boy holding the rooster all proper-like. there's just something about him that i couldn't walk away from. actually, after showing the hubby, i did walk away. we finished the rest of the flea market and i couldn't stop thinking of the silly little boy so i had to veto the hubby's vote and go back and get him. the frame was a dark brown that wasn't in the greatest shape. the corners were splitting apart, etc. i patched them up and then painted the frame a glossy white. i also had to redo the gold leafing because after taping off the area for paint, some of it peeled up. i'm really excited to hang my little friend in our new kitchen.

clutch_mosaic

here's a vintage clutch i picked up at the same flea market. the lady said she thought it was from the 40's. i love the ornate decoration on the outside. i think it would be the perfect addition to a simple little party dress. one of the best things is that the lady i bought it from said: "it looks like you". i took it as a major compliment. funny how a stranger can so quickly sum up my style!

design*sponge feature (again!)

othernews

i'm so excited that grace from design*sponge featured my latest project! i purchased the follow sewing bench/stool at a garage sale last week for $2! the before photos make the seat look more red than it was. it was actually more brown. blech. i removed the old seat, pin-tucked and top-stitched some new fabric into a "wave" pattern, and painted the base a glossy red. i then finished off the inside with a surprise little pattern. here's grace's post over at design*sponge.

before_full

befor_top

after_full

after_angle

after_closeup

after_topopen

after_inside
Blog Widget by LinkWithin