

i've been very excited to share this project with you. it all started last summer with the above pair of small shutters i found at a garage sale. i knew exactly what i wanted to make with them but i wasn't sure what that "something" might hold. at first i thought i would use it in my office, but then i had the idea of creating a jewelry case to house all of my vintage jewelry finds.
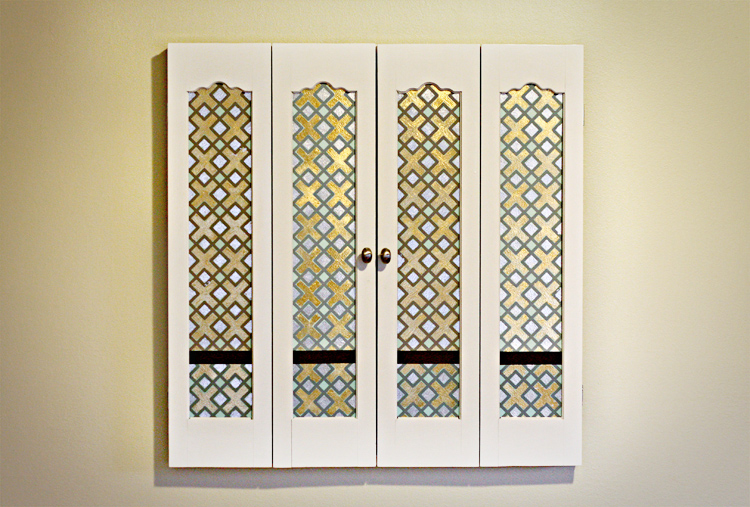
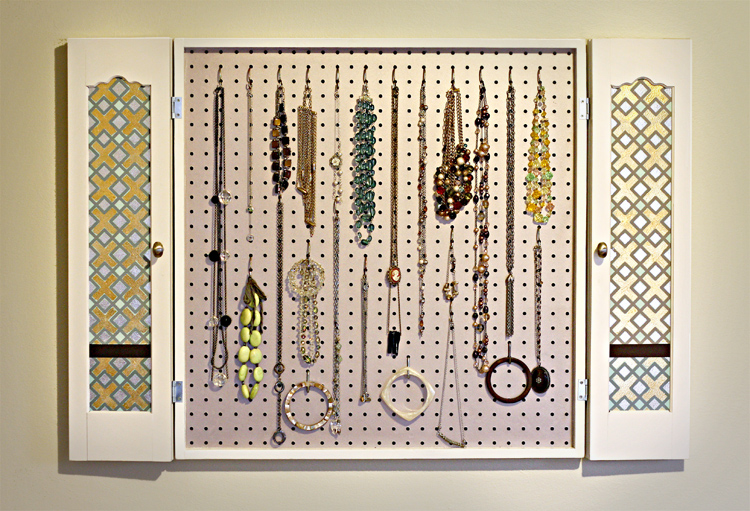
here's the finished product and a tutorial on how to make your own!
part of my challenge to myself with this project was to create it using materials that we already had. sort of a "green" thrifty project. i gathered some supplies and headed to my parent's house where my dad could help me with all the cutting. we don't have a ton of power tools here, so i needed to "borrow" some for the day.
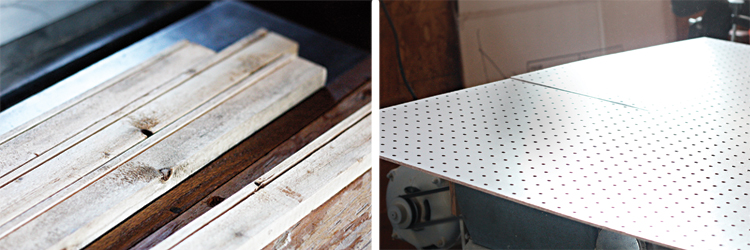
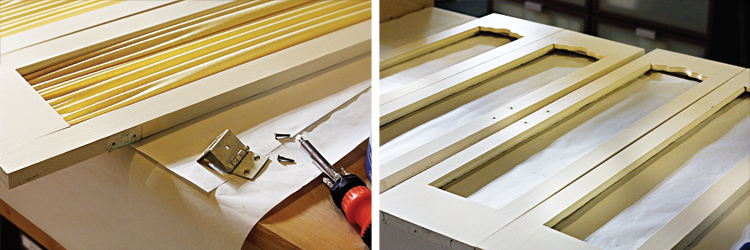
i brought over some left over trim from who-knows-what-project that was just sitting around in the garage. i also had some left over peg board from my office makeover. we used these two items to build the "frame" of the case. we started by cutting a channel into each of the side boards in which the peg board would sit. once it was all cut, we glued, screwed, and clamped it together to dry. this was the most tool-intensive part of the project. after this, it was smooth sailing and i headed home to finish the rest.

once i got home i patched up some spots in the wood that needed it and sanded it down.
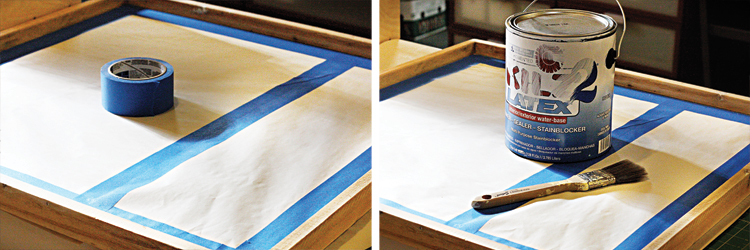
once nice and smooth, i applied a coat of primer and white paint. (all things that i had here) one step that i forgot to photograph along the way was applying a metallic spray paint to the inside/back of the case. this was also something i had in my craft closet!
once the frame was all painted and finished, i moved onto the shutter portion of the project.
the first thing i did was remove all the hardware. most of it was painted over several times and/or in really rough shape. none of it was salvageable. i also did away with the fabric panels on the inside of the shutters as i wanted something a little more sleek. i lightly sanded and put a fresh coat of white paint on the shutters to match the case.
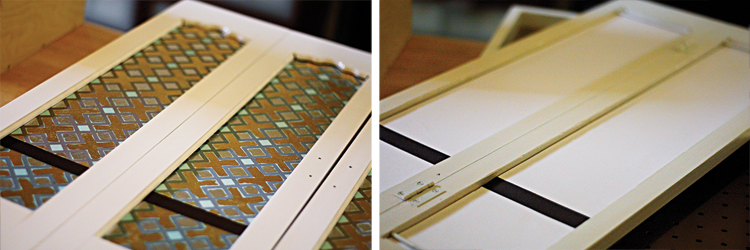
after the shutters were dry, i put in the inserts i made. this was sort of a painstaking process that most "normal" people probably wouldn't bother with, so i didn't photograph the steps, but i'll give you a quick rundown.
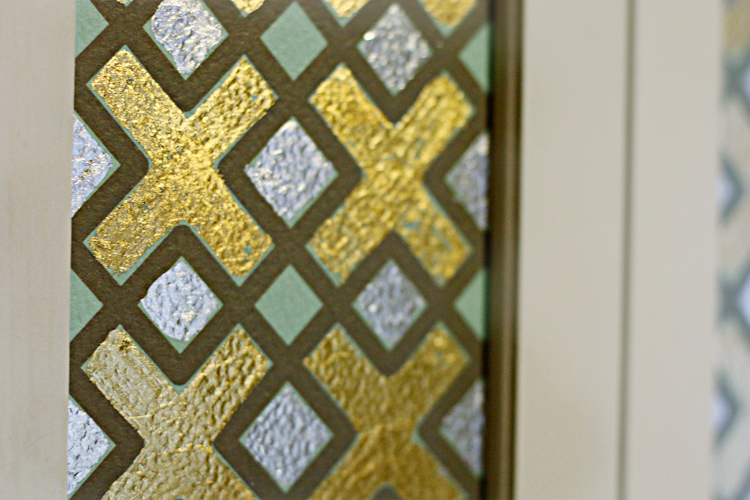
for the inserts: first i printed out some of my fin+roe patterns on my oversized printer to fit the panels. then i gold and silver leafed different areas of the pattern. i added a brown grosgrain ribbon accent near the bottom of the panel. because paper (even at 120#) is obviously a little floppy, i backed it with a chipboard then then a white paper on the back. i added the same grosgrain ribbon on the back of the panel as well so that when it's open it still looks finished. all of the supplies mentioned here were also things from the craft closet. nothing extra was purchased.
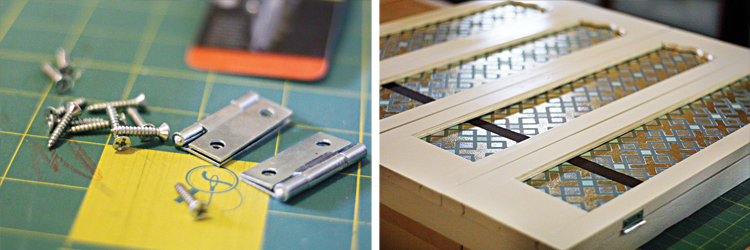
once the panels were all inserted, it was time to attach the shutters to the frame. unfortunately since the hinges were unsalvageable, i did have to buy a couple new sets. (plus the hinges that were attached were meant to hang directly on the wall so they wouldn't work for what i was doing) i simply pre-drilled some holes and screwed the hinges into both the shutters and the frame. the other thing i had to replace (and purchase) on this project was the knobs. the ones that were on when i bought them were crappy plastic pieces that were discolored. i picked up some inexpensive options at home depot and screwed them on. at this point i actually have a working case!


i attached a couple photo hangers to the back and hung it in our bedroom (part of a bedroom makeover i'm slowly working on). the most fun part was hanging all of my necklaces in it and seeing my vision come to life! you may remember me posting about my jewelry drawers in our bathroom a few months back. not to worry. those are still there and i'll now be able to spread things out a little more since the necklaces have a home of their own. no more doubling up on brooches!


13 comments:
Lori, you have incredible vision! This is a spectactular before & after!
so fantastic!
Yowza!
The door pattern is amazing - Rock the Casbah!
You are incredible.
This has actually given me a good idea - a good use for a very flat, glass doored cupboard I have in the barn waiting for a makeover.
Thanks!
lovely
This is soo neat! Are those plain S-hooks you used? I have to make one...thanks for the idea!
totally saw your project on design*sponge! how neat that they featured it!!!!!
Came here from Design Sponge, this is totally genius and I'm bookmarking it to do once I find gorg shutters like that! Thanks for sharing the how-to!
WOW...that was cool....at first I thought it was something to cover up a TV with, and then I saw what it really was...ingenious!
Such a great idea!! Your pictures are beautiful! I have included your project on a shutter inspiration post on my blog. You can find it here...
http://sweetdaisydesigns.blogspot.com/2010/11/shutter-envy.html
Thanks so much for sharing this project! It is so fun!
What a vision....Totally adorable...I appreciate it.
window shutters clayton, ca
Wow what an informative blog. Thank you very much for sharing. Looking forward to more!!
Post a Comment